DIY Golf Cart Inspection: 10 Brilliant Steps for Optimal Performance
A thorough DIY Golf Cart Inspection is not just a recommendation; it is an essential practice for any golf cart owner committed to ensuring their vehicle’s longevity, safety, and optimal performance. Neglecting regular checks can lead to unexpected breakdowns, costly repairs, and even safety hazards on the course or around your community. By taking a proactive approach, you empower yourself to identify minor issues before they escalate, saving both time and money in the long run.
This comprehensive guide will equip you with the knowledge and confidence to perform a brilliant DIY Golf Cart Inspection. We will break down the process into 10 actionable steps, covering everything from battery health to brake functionality. Whether you own an electric or gas-powered cart, these procedures are designed to be straightforward, allowing even beginners to maintain their vehicle with authority and precision. Embrace the satisfaction of keeping your golf cart in peak condition through diligent self-maintenance.
Key Takeaways
- Master 10 essential steps for a comprehensive DIY Golf Cart Inspection, ensuring peak performance and safety.
- Understand the critical tools required for an effective self-inspection, from voltmeters to tire gauges.
- Learn how to identify common golf cart problems early, preventing expensive repairs and extending your vehicle’s lifespan.
- Discover when to confidently handle maintenance yourself and when to seek professional assistance for complex issues.
Understanding the Importance of DIY Golf Cart Inspection
Regular maintenance is the cornerstone of responsible golf cart ownership. Just like any other vehicle, golf carts endure wear and tear with every use. A consistent DIY Golf Cart Inspection routine allows you to catch minor issues before they escalate into major, costly repairs. This proactive approach not only saves you money but also significantly extends the lifespan of your investment.
Beyond cost savings, safety is paramount. A well-maintained golf cart is a safe golf cart. By routinely checking critical components such as brakes, tires, and steering, you ensure that your vehicle operates reliably, protecting yourself, your passengers, and others on the course or path. This commitment to a regular DIY Golf Cart Inspection fosters peace of mind and enhances your overall enjoyment.
Moreover, performing your own checks provides a deeper understanding of your golf cart’s mechanics. This knowledge can be invaluable for troubleshooting minor glitches on the go or for effectively communicating with professional technicians should more complex issues arise. It transforms you from a passive user into an informed and capable owner, making your DIY Golf Cart Inspection a truly empowering experience.
Essential Tools for Your DIY Golf Cart Inspection
Before you begin your DIY Golf Cart Inspection, gathering the right tools is crucial. Having everything at hand will streamline the process and ensure you can perform each check accurately and safely. Most of these items are standard garage tools, making this an accessible task for most owners.
Gathering Your Gear for DIY Golf Cart Inspection
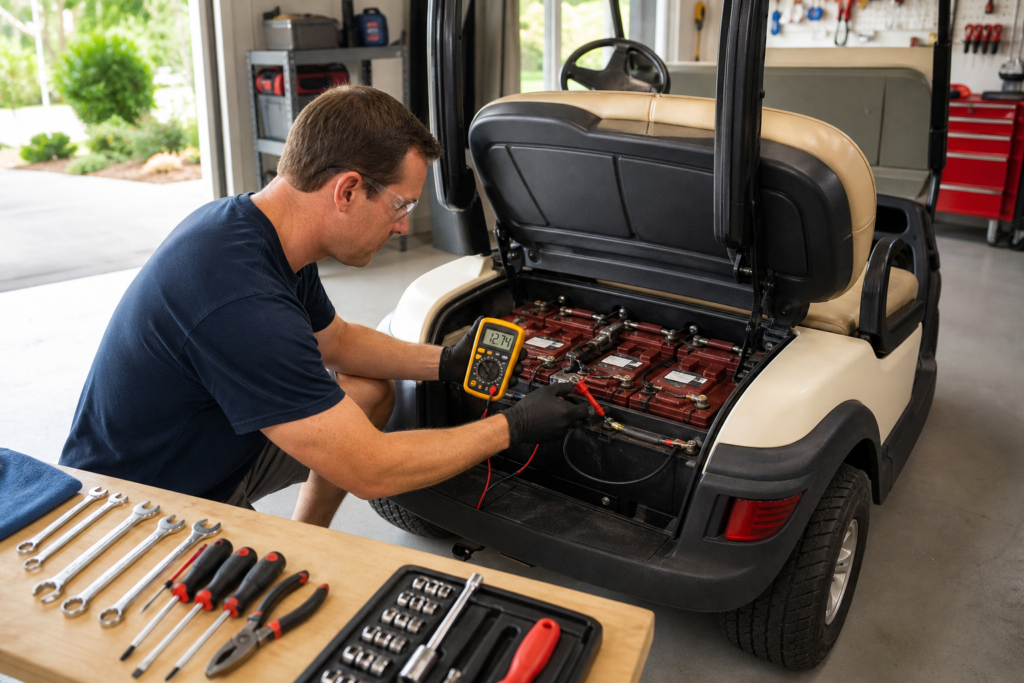
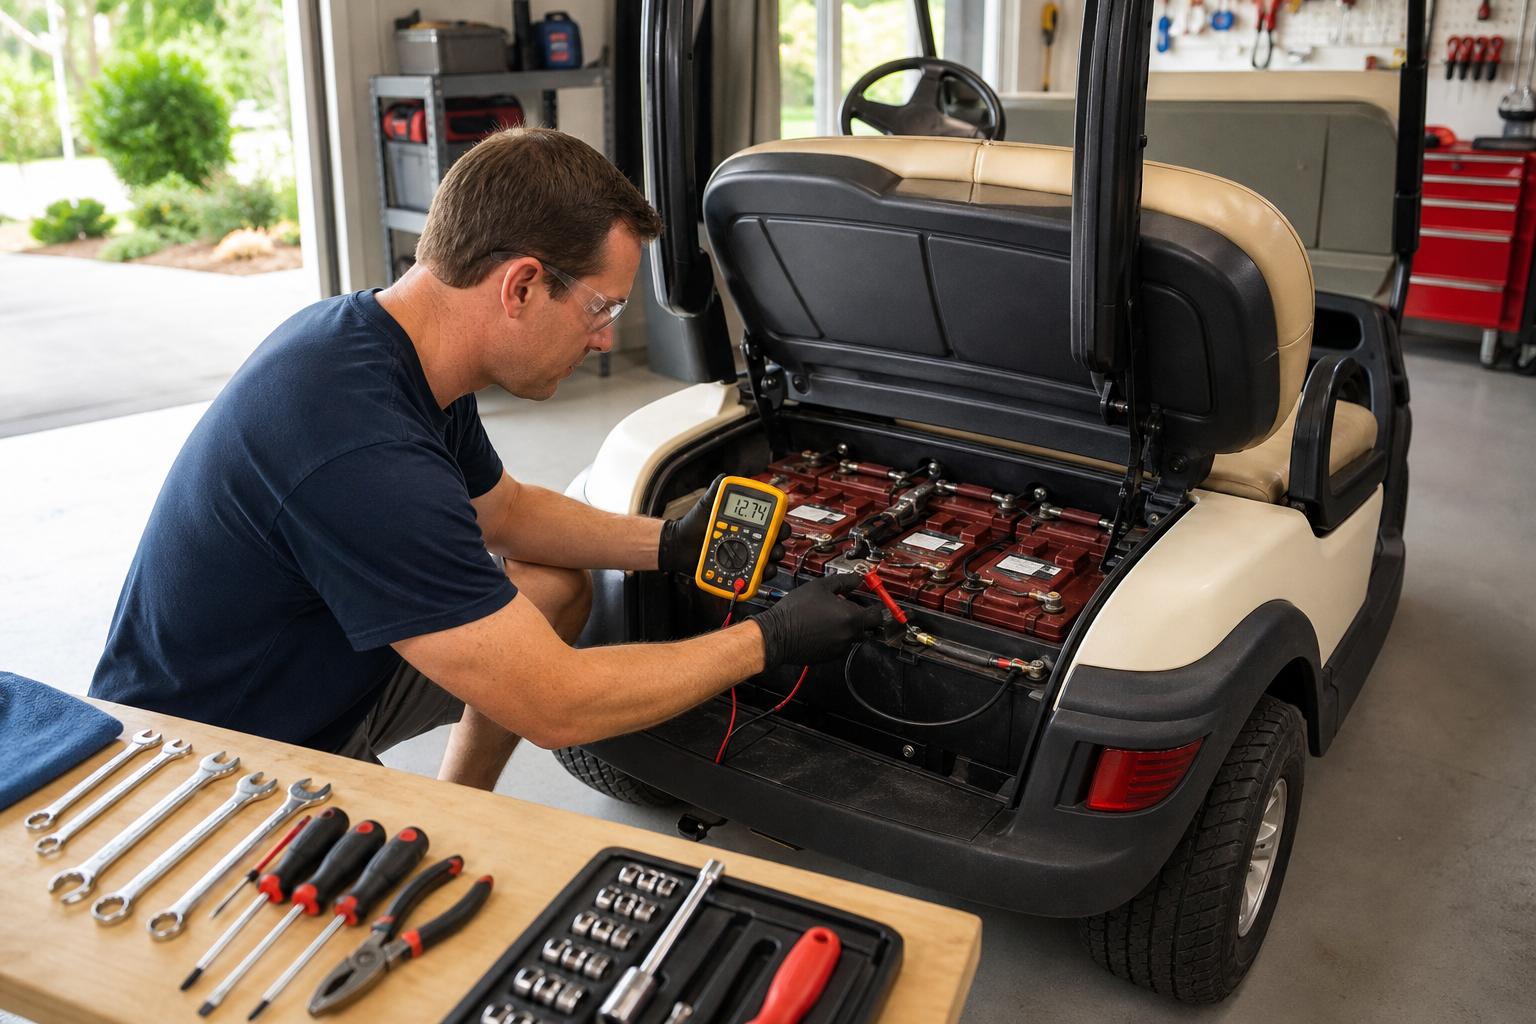
For a basic DIY Golf Cart Inspection, you will need a few key items. A reliable voltmeter is essential for checking battery voltage, while a tire pressure gauge is non-negotiable for maintaining proper tire inflation. A wrench set, including socket wrenches, will be useful for tightening terminals and other components. For lead-acid batteries, a battery hydrometer is necessary to check specific gravity.
Additionally, a flashlight will help illuminate hard-to-reach areas, and protective gloves and safety glasses are vital for personal safety, especially when working with batteries. Having a clean rag or shop towels, along with a wire brush for cleaning battery terminals, will also prove beneficial during your DIY Golf Cart Inspection. These simple tools form the foundation of a successful self-inspection.
Step-by-Step Guide: 10 Brilliant DIY Golf Cart Inspection Procedures
Embarking on a comprehensive DIY Golf Cart Inspection involves a systematic approach to ensure every critical component is assessed. Follow these 10 steps to cover all the bases, ensuring your golf cart remains in excellent working order. Each step builds upon the last, contributing to a thorough and effective maintenance routine.
Step 1: Battery Health Check for DIY Golf Cart Inspection
The battery system is the heart of an electric golf cart, and even gas carts rely on a 12V starting battery. Begin your DIY Golf Cart Inspection by ensuring the cart is turned off and the key is removed. For electric carts with lead-acid batteries, carefully remove the battery caps and visually inspect the water levels. The water should cover the plates by about half an inch. If levels are low, add distilled water, wearing protective gloves and eyewear.
Next, use your voltmeter to check the voltage of each individual battery and the total pack voltage. Look for any significant discrepancies, which could indicate a failing battery. Clean any corrosion from the terminals with a wire brush and baking soda solution, then tighten all connections. This crucial part of your DIY Golf Cart Inspection prevents common power issues.
Step 2: Tire Pressure and Wear During DIY Golf Cart Inspection
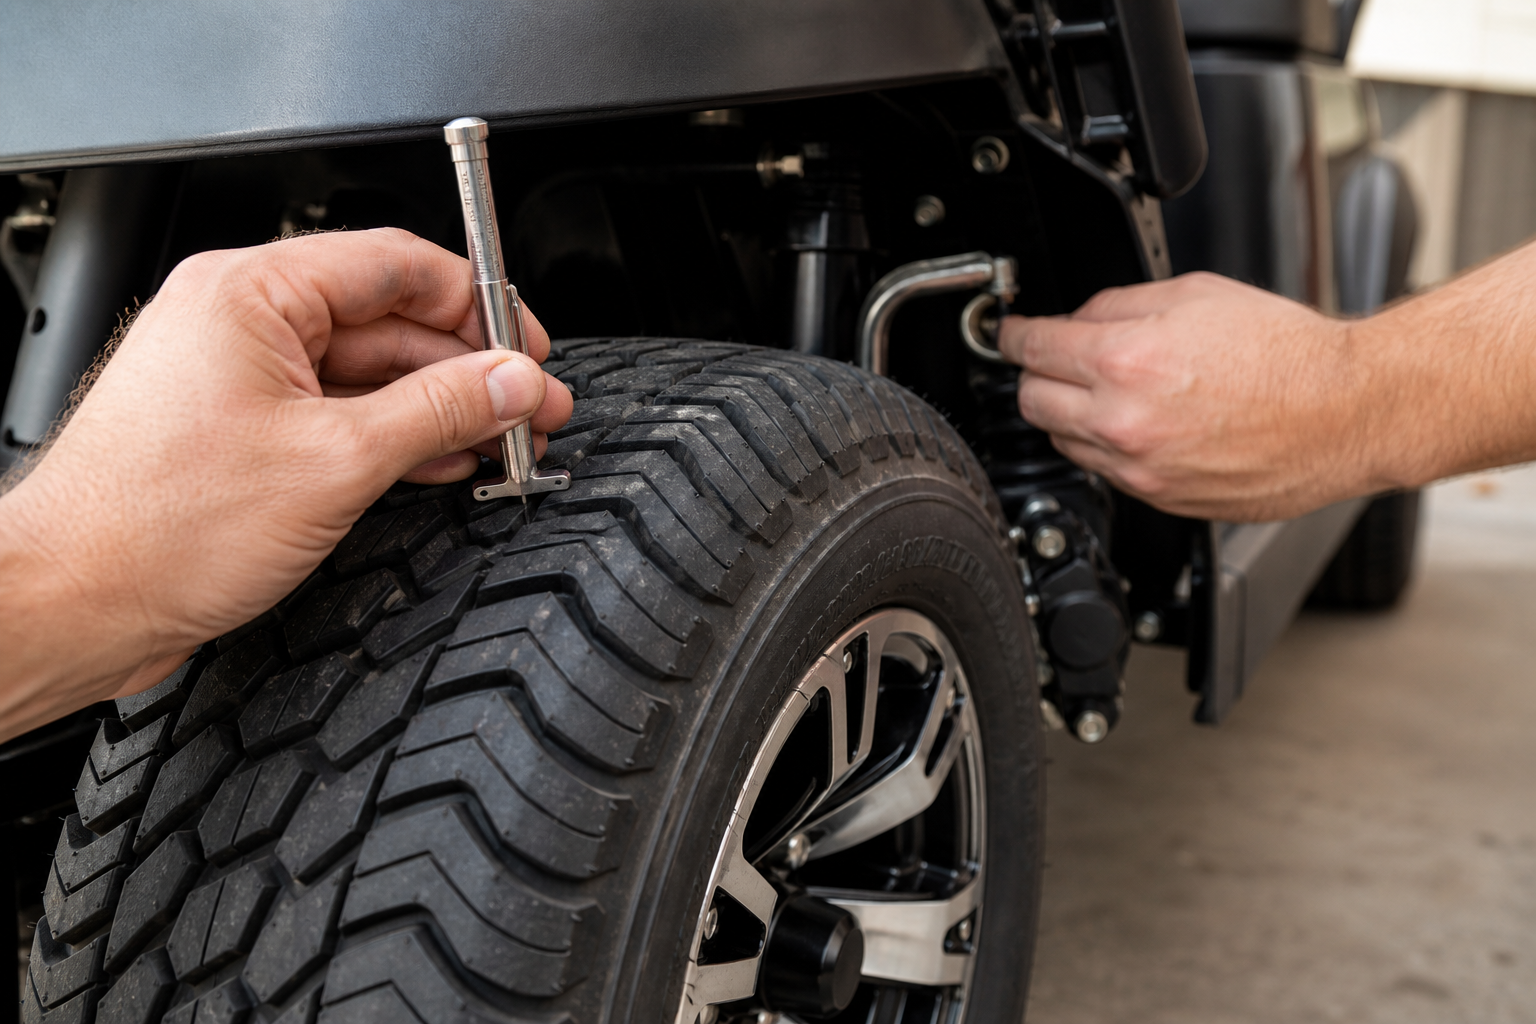
Tires are your golf cart’s connection to the ground, directly impacting ride quality, efficiency, and safety. During your DIY Golf Cart Inspection, use a tire pressure gauge to check the pressure in all four tires, including the spare if you have one. Refer to your golf cart’s manual or the tire sidewall for the recommended PSI. Improper inflation can lead to poor handling and premature wear.
Visually inspect each tire for signs of wear, such as low tread depth, cracks in the sidewalls, bulges, or embedded foreign objects. Uneven wear patterns can indicate alignment issues or suspension problems, which should be addressed promptly. Rotating your tires periodically can also help ensure even wear and extend their life, a smart practice during any DIY Golf Cart Inspection.
For more in-depth information on tire maintenance and safety, you can consult resources from the U.S. Tire Manufacturers Association.
Step 3: Brake System Assessment for DIY Golf Cart Inspection
Functional brakes are non-negotiable for safety. Your DIY Golf Cart Inspection should include a thorough examination of the braking system. Start by testing the brake pedal for proper resistance and travel. It should feel firm and engage smoothly, without excessive sponginess or stiffness. Listen for any grinding or squealing noises during braking, which often indicate worn brake pads.
Visually inspect the brake cables for fraying, rust, or looseness. Ensure they are properly routed and securely attached. For carts with drum brakes, you may need to remove the wheels to inspect the brake shoes for wear. If your cart has hydraulic brakes, check the fluid reservoir level. Addressing any brake issues during your DIY Golf Cart Inspection is critical for preventing accidents.
Step 4: Steering and Suspension for a Safe DIY Golf Cart Inspection
A responsive steering system and stable suspension contribute significantly to a comfortable and safe ride. During this part of your DIY Golf Cart Inspection, check for excessive play in the steering wheel. With the cart off, gently rock the steering wheel back and forth. Any significant looseness could indicate worn tie rod ends, ball joints, or steering box issues.
Inspect the suspension components, including leaf springs, shock absorbers, and bushings, for signs of wear, damage, or leaks. Look for cracked bushings or corroded springs. Bounce each corner of the cart to test the shocks; if the cart continues to bounce excessively, the shocks may need replacement. A proper DIY Golf Cart Inspection of these components ensures smooth handling.
Step 5: Lights, Horn, and Safety Features in Your DIY Golf Cart Inspection
All safety features must be fully operational, especially if you drive your cart at dusk or in areas with other vehicles. During your DIY Golf Cart Inspection, turn on the headlights, tail lights, and turn signals to ensure they are all functioning correctly. Test the horn to confirm it produces a clear, audible sound. If your cart is equipped with seatbelts, inspect them for fraying or damage and ensure the buckles latch securely.
Check the reverse warning buzzer (if present) to confirm it activates when the cart is put into reverse. Also, verify that the parking brake holds the cart firmly in place on an incline. These simple checks during your DIY Golf Cart Inspection are vital for both compliance and accident prevention.
Step 6: Fluid Levels and Leaks for DIY Golf Cart Inspection (Gas Carts)
For gas-powered golf carts, monitoring fluid levels is as important as battery checks for electric models. Your DIY Golf Cart Inspection should include checking the engine oil level, typically using a dipstick. Ensure the oil is at the recommended level and appears clean. Low or dirty oil can lead to engine damage.
Also, inspect the differential fluid level, often found in a separate reservoir or accessed via a plug. Refer to your owner’s manual for specific locations and recommended fluid types. While performing these checks, look for any signs of fluid leaks under the cart, which could indicate a gasket failure or other mechanical issue. Addressing leaks during your DIY Golf Cart Inspection prevents more serious problems.
Step 7: Cable and Wiring Integrity in DIY Golf Cart Inspection
The electrical system, whether 12-volt or high-voltage, relies on sound wiring. During your DIY Golf Cart Inspection, visually inspect all accessible wiring and cables for fraying, cracks, or exposed copper. Pay close attention to battery cables, motor cables, and any connections to controllers or solenoids. Corrosion on terminals or connectors can impede electrical flow and cause performance issues.
Ensure all connections are tight and secure. Loose connections can generate heat, leading to damage or even fire. If you notice any damaged wiring, it is crucial to repair or replace it immediately. This step of the DIY Golf Cart Inspection is vital for preventing electrical malfunctions and ensuring consistent power delivery.
Step 8: Frame and Body Condition During DIY Golf Cart Inspection
The structural integrity of your golf cart is fundamental to its safety and longevity. As part of your DIY Golf Cart Inspection, carefully examine the frame for any signs of rust, cracks, or bending. Pay particular attention to weld points and areas that might experience stress, such as around the suspension mounts. Minor rust can be treated, but significant structural damage may require professional assessment.
Inspect the body panels for cracks, dents, or loose attachments. Ensure all body components are securely fastened. A damaged body can not only look unappealing but also compromise the protection it offers. This visual aspect of your DIY Golf Cart Inspection helps maintain both aesthetics and structural soundness.
Step 9: Accelerator and Reverse Functionality for DIY Golf Cart Inspection
Smooth and reliable operation of the accelerator and reverse mechanisms is essential for safe driving. During your DIY Golf Cart Inspection, with the cart on a level surface and in a safe, open area, slowly depress the accelerator pedal. It should engage smoothly and provide consistent power without hesitation or jerking. Test the full range of acceleration.
Shift the cart into reverse and ensure it engages properly and moves backward smoothly. Listen for any unusual noises during acceleration or deceleration. If your cart has a speed controller, ensure it functions as expected. Any erratic behavior in these systems during your DIY Golf Cart Inspection warrants further investigation.
Step 10: General Cleanliness and Lubrication for DIY Golf Cart Inspection
While often overlooked, general cleanliness and proper lubrication play a significant role in your golf cart’s performance and lifespan. Conclude your DIY Golf Cart Inspection by cleaning the cart thoroughly, removing dirt, grass, and debris from the chassis, engine compartment (for gas carts), and undercarriage. A clean cart makes it easier to spot future leaks or issues.
Identify any moving parts that require lubrication, such as steering components, brake linkages, and suspension pivot points. Apply appropriate grease or lubricant as recommended by your owner’s manual. This final step in your DIY Golf Cart Inspection helps prevent premature wear, reduces friction, and ensures all moving parts operate smoothly and efficiently.
Ready for a Professional DIY Golf Cart Inspection or Expert Service?
Even with brilliant DIY efforts, some golf cart needs are best handled by certified experts. Phoenix Golf Car in Pompano Beach, FL, offers unparalleled service and parts for all major golf cart brands, ensuring your vehicle performs at its peak.
Common Problems Identified by a DIY Golf Cart Inspection
A diligent DIY Golf Cart Inspection is your first line of defense against a myriad of common issues. By regularly performing these checks, you can often spot problems in their infancy, preventing them from escalating into more severe and expensive repairs. This proactive approach is key to maintaining a reliable and enjoyable golf cart.
Troubleshooting During Your DIY Golf Cart Inspection
During a routine DIY Golf Cart Inspection, you might identify several common problems. These include low tire pressure, which can affect handling and tire longevity, or worn brake pads that compromise stopping power. Loose or corroded battery terminals are frequent culprits behind power loss in electric carts, while low battery water levels can severely shorten battery life.
Other issues a DIY Golf Cart Inspection can uncover include frayed brake cables, indicating a need for replacement, or excessive play in the steering, which points to worn steering components. Faulty lights or a non-functional horn are safety concerns that are easily spotted during a visual check. Addressing these findings promptly ensures your golf cart remains safe and performs optimally.
Frequency of Your DIY Golf Cart Inspection
Establishing a consistent schedule for your DIY Golf Cart Inspection is crucial for optimal performance and safety. The ideal frequency depends on how often you use your cart and the conditions it operates in. However, a general guideline can help you maintain a proactive approach to maintenance.
Developing a Routine DIY Golf Cart Inspection Schedule
For most golf cart owners, a basic DIY Golf Cart Inspection should be performed monthly. This includes quick checks of tire pressure, battery water levels, and a visual scan for obvious damage or leaks. This routine helps catch emerging issues before they become significant problems. For a more comprehensive DIY Golf Cart Inspection, similar to a tune-up, aim for every 6 months or after every 100-150 hours of use, whichever comes first.
If you use your golf cart daily, in rough terrain, or for heavy-duty tasks, you might consider increasing the frequency of your checks. Conversely, if your cart is stored for extended periods, a thorough DIY Golf Cart Inspection before and after storage is highly recommended. Consistency in your inspection schedule is more important than strict adherence to a calendar date.
When to Seek Professional Help After Your DIY Golf Cart Inspection
While a DIY Golf Cart Inspection empowers you to handle many maintenance tasks, it is equally important to recognize when a problem exceeds your expertise or requires specialized tools. Knowing your limits can prevent further damage and ensure your safety.
Understanding the Limits of DIY Golf Cart Inspection
You should consider professional golf cart service after a DIY Golf Cart Inspection if you encounter complex electrical issues, such as persistent controller errors or motor problems. Significant brake issues that go beyond simple pad replacement, like hydraulic system failures, are also best left to certified technicians. Any persistent steering or suspension issues that you cannot diagnose or resolve with basic adjustments warrant professional attention.
Furthermore, if you notice unusual noises from the motor, differential, or transmission, or if your cart experiences a significant loss of power that isn’t battery-related, it’s time to consult an expert. Phoenix Golf Car in Pompano Beach, FL, offers comprehensive diagnostics and repairs for all major golf cart brands. Their certified technicians can address issues that fall outside the scope of a typical DIY Golf Cart Inspection, ensuring your vehicle receives the precise care it needs.
Resources for Your DIY Golf Cart Inspection Journey
To further support your efforts in performing a thorough DIY Golf Cart Inspection, a wealth of resources is available. Leveraging these tools can enhance your understanding, provide visual guidance, and help you acquire necessary parts.
Finding Replacement Parts for Your DIY Golf Cart Inspection
After a thorough DIY Golf Cart Inspection, you might identify the need for replacement parts such as new brake pads, tires, battery cables, or even a new set of batteries. Reputable suppliers for golf cart inspection parts online include specialized golf cart parts websites and general automotive parts retailers that carry golf cart components. Always ensure you purchase parts compatible with your specific golf cart make and model.
Many manufacturers also provide printable checklists for DIY Golf Cart Inspection, which can be downloaded from their official websites. These checklists often include specific torque specifications and maintenance intervals tailored to their vehicles. Additionally, platforms like YouTube host numerous instructional videos demonstrating various DIY Golf Cart Inspection procedures, offering visual step-by-step guidance that can be incredibly helpful for beginners.
Comparing DIY Golf Cart Inspection to Professional Service Costs
Understanding the financial implications of maintaining your golf cart is a key part of responsible ownership. The choice between a DIY Golf Cart Inspection and professional service often comes down to a balance of cost, complexity, and personal skill level.
The Value of a Thorough DIY Golf Cart Inspection
A typical professional golf cart inspection can range from $75 to $150, depending on the service provider and the depth of the inspection. This cost does not include any necessary repairs or replacement parts. While this provides expert assurance, performing a DIY Golf Cart Inspection incurs minimal direct cost, primarily for basic tools and consumables like distilled water or lubricants.
The significant savings come from identifying and addressing minor issues yourself before they require costly professional intervention. For instance, replacing a worn brake cable during a DIY Golf Cart Inspection is far less expensive than a full brake system overhaul caused by prolonged neglect. While complex diagnostics and repairs are best left to professionals, the preventative power of a regular DIY Golf Cart Inspection offers immense value, extending your cart’s life and reducing overall ownership expenses.
What are the essential steps for a DIY golf cart inspection?
A thorough DIY golf cart inspection involves checking the battery, tires, brakes, steering, lights, and general frame for wear and tear. It also includes verifying fluid levels and ensuring all safety features are operational.
How often should I perform a DIY inspection on my electric golf cart?
For optimal performance and safety, perform a basic DIY golf cart inspection monthly. A more comprehensive check, similar to a tune-up, should be conducted every 6 months or after every 100-150 hours of use.
What tools are necessary for a basic golf cart self-inspection?
Essential tools for a basic DIY golf cart inspection include a voltmeter, tire pressure gauge, wrench set, battery hydrometer (for lead-acid batteries), a flashlight, and protective gloves.
Why is it important to regularly inspect your golf cart yourself?
Regularly inspecting your golf cart yourself is crucial for identifying minor issues before they become major, costly repairs. It enhances safety, extends the vehicle’s lifespan, and maintains optimal performance, saving you time and money.
How do I check the battery water levels during a DIY golf cart inspection?
To check battery water levels during a DIY golf cart inspection, ensure the cart is off. Carefully remove battery caps, and if the water is below the plates, add distilled water until it covers the plates by about half an inch. Wear protective gear.
What common problems can a DIY golf cart inspection help identify?
A DIY golf cart inspection can help identify common problems such as low tire pressure, worn brake pads, loose battery terminals, low battery water, corroded cables, faulty lights, and steering issues, preventing breakdowns.
When should I consider professional golf cart service after a DIY check?
You should consider professional golf cart service after a DIY check if you encounter complex electrical issues, significant brake problems, persistent steering or suspension issues, or any problem that exceeds your diagnostic or repair capabilities.
Can a beginner effectively perform a DIY safety inspection on a golf cart?
Yes, a beginner can effectively perform a basic DIY safety inspection on a golf cart by following a clear checklist. Focus on visual checks and simple measurements like tire pressure, ensuring to consult professionals for complex repairs.
What are the key areas to inspect for tire wear on a golf cart?
For tire wear, inspect the tread depth, looking for uneven wear patterns which can indicate alignment issues or improper inflation. Also, check for cracks, bulges, or punctures on the sidewalls and tread.
How to inspect golf cart brakes at home?
To inspect golf cart brakes at home, check the brake pedal for proper resistance and travel. Visually inspect the brake cables for fraying or looseness and examine the brake drums/pads for wear, adjusting or replacing as needed.
A consistent and thorough DIY Golf Cart Inspection is an invaluable practice for any golf cart owner. By following these 10 brilliant steps, you not only ensure the safety and longevity of your vehicle but also gain a deeper understanding of its mechanics. From checking battery health to assessing brake functionality, each inspection contributes to optimal performance and a more enjoyable experience on the course or around your neighborhood.
Remember, while a DIY Golf Cart Inspection covers many essential aspects, knowing when to consult professionals is equally important. For complex issues or when you require expert service and parts, trusted providers like Phoenix Golf Car are ready to assist. Embrace the power of self-maintenance, and drive with confidence, knowing your golf cart is in peak condition.